The fence industry is showing no signs of slowing down, particularly the analyst reports which are projecting that the growth will reach a gargantuan market value of $44.39 Billion by 20230.
As you digest those numbers, come join the billions who already own a fence. However, building a fence requires a lot of meticulous preparation and planning. You have plenty of options for choosing which materials you want to use for making your fences such as wood, vinyl, metal, and composite materials.
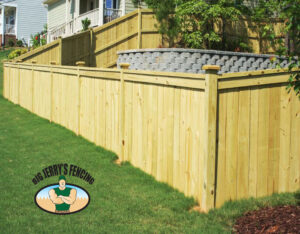
There are many things that you gotta take into consideration throughout the process for building your own fence. Read on to learn more about the specifics of the fence installation process. Most homeowners prefer to have their fence professionally installed as opposed to DIY. If you’d prefer to have a professional build a fence on your property, contact your local Big Jerry’s Fencing for a free fence quote.
Planning for your fence
Here’s what you need to keep in mind, for building your fence:
1 – Know your property boundaries: Get your property surveyed Knowing where your property lines are located is an important part of owning a home, but it is particularly vital when installing a new fence. To avoid costly disputes with your neighbors you will need to ensure the fence is built on your property and does not encroach on your neighbors’ land. Visiting your local county recorder or assessor’s office is helpful for determining the boundary of your home. Alternatively, you can find where your property line is, by contacting a local property surveying company and requesting to have your property pins marked or flagged. Also giving your neighbors a heads up for your upcoming fence project to avoid confusion and potential delays is always a friendly gesture that you should do.
2 – Learn local fence rules: Research and understand your local fence guidelines and restrictions to know what you can and can’t do with your fence. Most cities, townships, and counties have their fence rules posted online and are easily accessible to the general public. These rules often dictate the height of the fence, the fence materials to be used, and where you can place the fence on the property. Many areas also require a building permit prior to building a fence. Not adhering to the local ordinances can result in fines and liens on your property. Don’t brush off learning the rules, because building a fence is hard work and can be expensive, but even more so when you have to redo it a second time because you didn’t follow the appropriate guidelines. So, yeah, make sure you build your fence right the first time.
3 – Measure your layout: Once you know where your property lines are located and what fence regulations impact your property, you’re good to measure up for your desired fence layout. Measuring the perimeter of the potential fence area helps in nailing down the total linear footage, it is a good idea to work up a sketch and document the measurements for each respective fence line, as that could impact the materials you will need. Choose exactly where you want your fence gates, then measure and document all gate sizes. Gates can be made from partial panels or by assembling the rails and pickets to blend with the rest of the fence; you can also purchase gate kits from many fence supply companies.
4 – Submit plans to your HOA: Many communities have a Homeowners Association or HOA, that acts as a governing body for the neighborhood. These HOAs, oftentimes have set guidelines for the exterior aesthetics of the homes within the community. These restrictions dictate things like what trees you can plant in your front yard and what type of fence you are allowed to have. Usually, these guidelines will tell you where the fence is allowed to be installed on the property as well. If your neighborhood has an HOA in place, then you will likely need to submit a fence application to the architectural review committee. On average, this review and approval process occurs every 30 days, and approvals are usually sent out via email, or they will mail an approval letter to you. It is highly recommended that you always wait for approval before building your new fence to prevent potentially costly discrepancies.
5 – Order Materials: If you are building a fence using pre-assembled panels, divide the linear footage of fencing by the panel length (in feet) of the style fence you selected. This will determine the total number of fence panels and posts you need. The remaining footage will require a partial panel. Add an additional post for each corner of the property to determine the total number of posts you will need. Make sure to order your gate posts separately; most fence types require bigger, stronger, or otherwise reinforced posts for the hinge side of the gate. Some fence styles have different posts to use in certain parts of the layout, such as corners and ends, make sure you take this into account when ordering your fence materials. Don’t forget to order the extra items like post caps, concrete, and gate hardware. This step can seem complex and challenging because of the specific calculations involved, so if you feel like you’re struggling, best to call in a professional to help you with that.
6 – Call 811 before you dig: You should always request to have your underground utility lines located through 811 prior to installing your fence. 811 is a national call-before-you-dig service that will request to have your utility lines located and marked by your local utility companies or other locating services. It is important to note that the 811 ticket only covers your public utilities; this means your private lines, such as irrigation, will not be marked by 811. All lines that are marked by a locating service have a grace area of 2 feet to each side of the marking. That means the utility line could be anywhere within that 4-foot- wide path. So, do this to avoid extra repair and hindrances for yourself.
Building your fence
Now that the prep work’s done, here’s how you get to the actual process of building your fence.
1 – Run a string line
First, start by running a string line parallel to the house. Then, run perpendicular lines to complete the perimeter, crossing the string line at the corners of the property. If done properly, this will help ensure that your fence lines are straight and stay within the constraints of your property.
2 – Mark your corners & gates
Using spray paint, mark the locations of your corners and end posts. Your end posts will essentially just be where the fence will start and end. In most cases, this is somewhere on each side of your house. Spray paint parallel lines on the ground to indicate the gate placement. Gates are usually 4ft or 5ft wide, depending on need; if you don’t have the need for the additional clearance, then it is recommended to go with 4ft wide to help prevent common gate problems such as leaning and sagging. This will also help minimize any sizeable gaps underneath the gate door. The marking visuals take care of the problem of constantly looking up your design on paper to check if you’re building your fence right or not.
3 – Dig your holes
You are now ready to start digging your fence post holes using a post hole digger or an auger. However, if you are digging through a concrete slab, a core drill or concrete breaker may be required. Now, a critical question should be on your mind:
How far apart should I set my fence posts?
The answer: the distance between each fence post depends on the type of fence material you are using. You will want to dig the fence posts based on the width of the fence panels you are using. Most styles of wood fences are built in 8ft sections, while most vinyl and aluminum come in 6ft sections. Chain link fence posts are typically set about 10ft apart, while farm-style fences vary depending on style and application (usually between 8-12ft apart). Another key question is:
How deep should I dig my fence post holes?
Again, this answer’s not straightforward, folks. The depth of the hole for your fence posts depends on the type of soil, fence design, height, and even where you live. In general, the depth of the post’s hole needs to be about 1/3 of the above-ground height of the post. This means if you are installing a fence with a finished height of 6ft then you should have at least 2ft of post below ground. Additionally, the bottom of the post needs to sit below the frost line (reference local codes for exact requirements). The frost line (also called frost depth) varies from region to region. For example, the frost line in Holly Springs, North Carolina, is 10 inches, while the frost line in Pittsburgh, Pennsylvania, is 44 inches.
How much concrete should I use for my fence post holes?
This depends on the type of soil, fence design, height, post size and bag weight. Generally speaking, most fences will require between ½ bag to 2 bags of concrete per post hole. Keep in mind, though, that In some places like Jacksonville, Florida, concrete is typically not recommended on wood fences. This is because concrete can trap the moisture that the fence posts soak up from the ground, acting as a breeding ground for rot and, in turn, expediting the aging process of your wood fence.
Build the fence
The construction of your fence is going to depend on the fence material you are using. Each style of fence is installed a little bit differently. Are you stick building your wood fence from scratch, or are you using premade panels? If you are installing a vinyl fence, make sure you understand the differences between tongue and groove products vs. the prefabricated panels that get screwed to fence posts with brackets. Aluminum fences are likely the easiest fences to install as the panels are relatively lightweight and require little assembly. Make sure to account for shifts in the grade on your property and install your fence accordingly.
Don’t worry if you don’t own all the tools needed to complete your DIY fence project, you don’t gotta buy them, as many home improvement stores offer the option to rent tools from them.
If you’ve read this article and feel that it is probably best to leave this one to the professionals, don’t worry; you aren’t alone. According to research reports, most homeowners prefer it if their fences are installed by professionals, as opposed to DIY, as their placement and aesthetics in the premises play a crucial role in determining the value and marketability of the property. If you’d prefer to have a professional build a fence on your property, contact your local Big Jerry’s Fencing for a free fence quote.