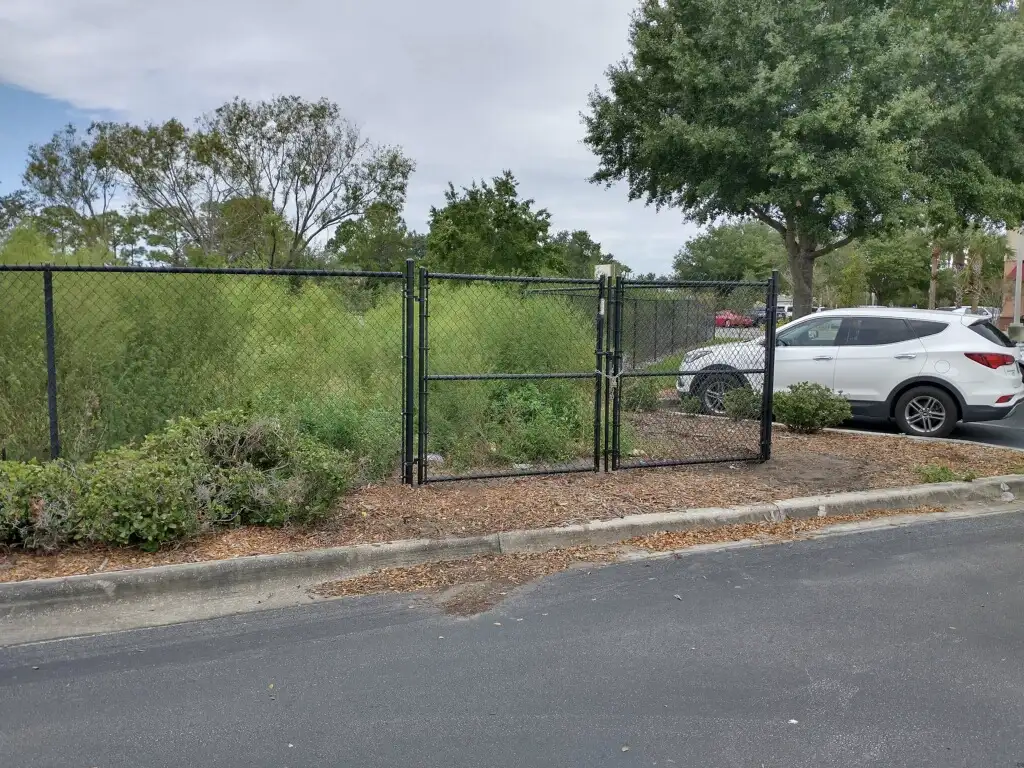
A well-built chain-link fence is one of the most time-tested fences you will ever see. Just take a quick drive around your local town and you will see chain link fences still standing that were built decades ago. Chain link fences come in galvanized steel, or a vinyl coated finish that comes in various color options making it a great fit for residential and commercial fence applications. A chain link fence is a great option when you are concerned with security or if you simply need a cost-effective option for containment. If you are wanting to install a chain link fence at your home, be sure to check if your HOA allows chain link fences in your neighborhood. Chain link fences are highly customizable with the ability to add on barb wire, windscreens, privacy screens, or privacy slats. If you want a fence that is strong, resilient, and extremely durable, read our 11-step guide on installing chain link fences and give it a try for your next do it yourself project.
Materials:
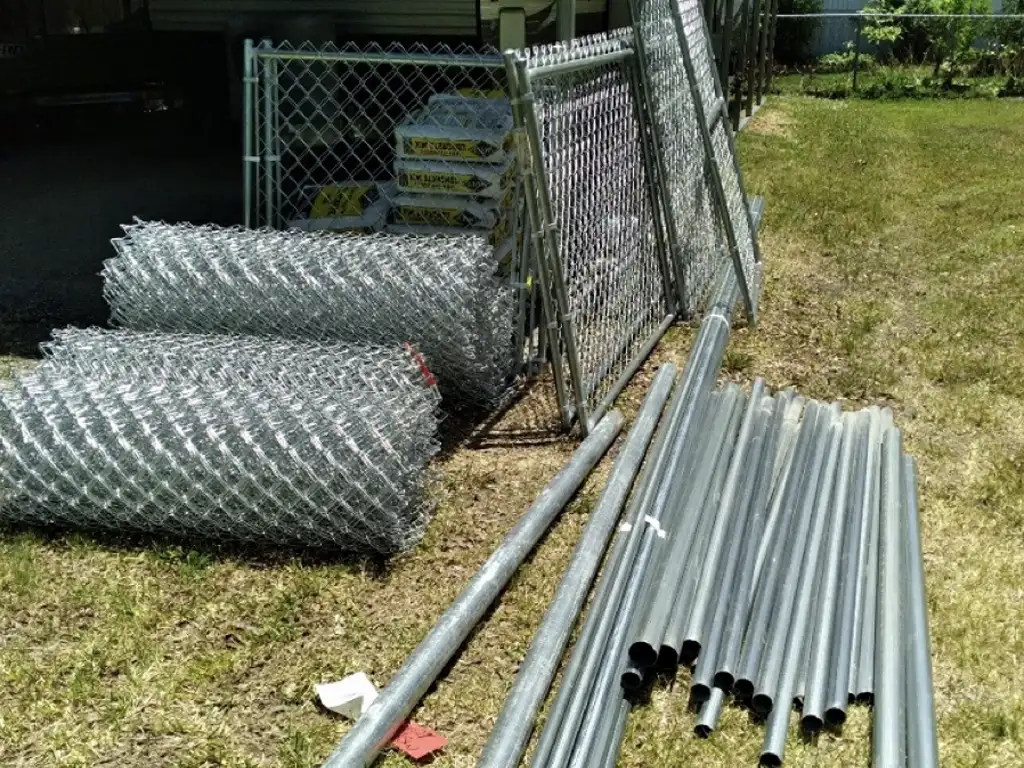
- Chain Link Wire Fabric: Wire mesh used around perimeter of the fence.
- Top Rail: Runs along the top of the fence.
- Terminal Posts: Posts used for ends, corners, and gates.
- Terminal Post Dome Caps: Caps that go on top of the terminal posts.
- Line Posts: Posts that are used in between terminal posts on each fence run.
- Line Post Loop Caps: Caps that hold the top rail in place and are used on each line post.
- Tension Bars: A vertical bar that is the height of the fence and is woven into the chain link mesh at each terminal post.
- Tension Bands: Bands that hold the tenson bar and attach to the terminal posts.
- Rail Ends: Caps for each end of the top rail.
- Brace Bands: Bands that hold the rail ends and attach to the terminal posts.
- Tension Wire: Wire that runs along the bottom of the fence to add strength.
- Wire Ties: Ties that attach the chain link wire fabric to the line posts and top rail.
- Carriage Bolts & Nuts: Hardware used throughout the fence installation including the rail ends, brace bands, tension bands.
- Hog Rings: Used to secure chain link wire fabric to tension wire.
- Concrete: Used to stabilize line post and ends posts that have been set in post holes.
Tools:
- Pencil
- Post Hole Digger or Auger
- Circular Saw or Skill Saw
- Chain Link Come-Along and Stretcher Bar
- Impact Drill and Sockets
- Socket Wrench
- Measuring Wheel
- Tape Measure
- Mason Line
- Wooden Stakes
- Steel Tamping Bar
- Rubber Mallett
- Wire Cutters
- Level
- Prep your Fence Project
Find your property pins. Before installing a chain fence make sure you have your property pins located so that you install the fence on your property. https://bigjerrysfencing.com/preparing-for-your-fence/
Call 811 to have your underground utility lines marked. This will tell you where you are unable to dig and may impact your design of the fence layout. Learn more about having your utilities located, flagged, and sprayed before digging in your yard. https://bigjerrysfencing.com/what-is-811-locating-utility-lines-for-your-fence-installation/
Measure each fence line where you plan to install the wood fence. You can use a measuring wheel or tape measure. Use spray paint to mark the ground where you the chain fence to begin and end, mark the corners along the way. Mark the gate opening if you plan to install a chain link gate.
- Get your Fence Materials
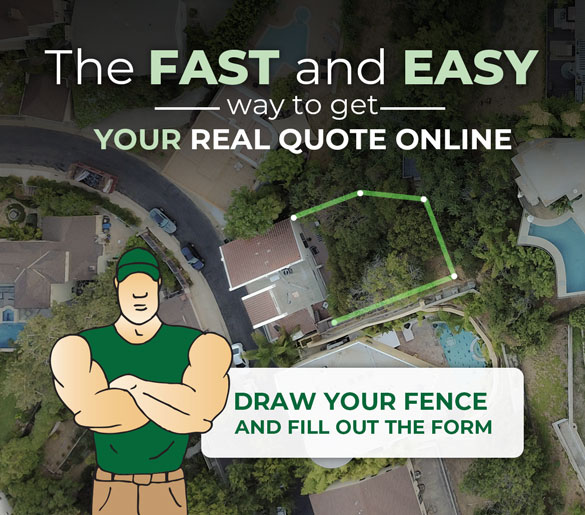
Make a list of chain link fence materials that you will need to complete the job. You will need a terminal post at every end, corner, and each side of a gate. A standard chain link fence will typically have line posts set 10ft apart. Top rail and tension wire will be needed for the full length of the fence. Many fence suppliers will create a material list for you if you provide them with a drawing that includes measurements. Be sure to get a free estimate and sketch from Big Jerry’s Fencing to compare the cost of hiring a fence pro to install the fence for you.
(FREE ESTIMATE BUTTON PLACEHOLDER)
- String your Fence Layout
Run a string line for each fence line. Install a wooden stake at each end, corner, and any steep grade shifts. Tie a string from stake to stake and make sure it is taut. Doing this will ensure that your fence lines are straight and stay true to your planned layout. Run the mason’s line through all your desired gate openings. DO NOT eyeball the placement of your fence posts, always use mason line when installing a new fence. NEVER guess where you are setting your fence posts and ALWAYS use string line when installing a chain link fence.
- Dig Your Fence Post Holes
Dig your post holes. You can dig by hand with a post hole digger or speed up the process using a powered auger, be careful when digging and look out for unmarked private utilities such as sprinkler lines. Dig your post hole depth one-third of the length of your post. If you are installing a 6ft tall chain link fence, dig the post holes 2ft deep. Refer to local building codes for guidelines on how deep to set fence posts in your area as frost depth will play a factor in this.
- Set the Chain Link Fence Posts
Set the terminal posts in their respective post holes. When setting your fence posts in the ground, use a level to ensure that the fence posts are plumb. Pour the concrete mix into the fence post hole and follow the mix instructions listed on the bag. In some areas, the moisture in the ground will work with the concrete mix and cure or harden the concrete in 48-72 hours. Use 60lbs – 120lbs of concrete, or one to two bags per post hole for ends, corners, and gates and fill the remaining space in the hole with the excess dirt from when you did your digging. Tightly pack the dirt in the ground surrounding the post using the plant end of your steel tamping bar. We always recommend using concrete when installing a chain link fence so that the fence comes out stable and sturdy for years to come:
Next, set the line posts with 30lbs – 60lbs (1/2 to 1 bag) of concrete per post. The chain link fence posts should flush against the string line without pushing it to protrude out. Don’t fill the line post holes and tamp the ground until after installing the top rail. You may need to adjust the height of the fence posts before you finish.
- Attach Tension Bands and Brace Bands
Slide the tension bands on to each terminal post. The height of the fence will determine how many tension bands need to be used on each post. Take the height of your fence in feet and subtract one to determine how many tension bands to use.
Drop a brace band over the terminal posts at each gate and end and use two brace bands for the corners.
- Add Post Caps
Secure the post caps to their respective fence posts using a rubber mallet. As a reminder, the loop caps, or the ones with holes in them, go on top of the line posts. The terminal caps, or dome caps, get placed on top of the terminal posts at the ends, corners, and gate openings.
- Install the Top Rail
Using the carriage bolts, attach a rail end to each brace band at the terminal posts.
Attach the top rail to the top of the fence posts by feeding the rail through the loop caps on the line posts. You may need to cut the top rail to fit at the end of the fence line.
Place each end of the top rail into their appropriately named rail ends. Measure to ensure the rail ends are equal to the height of the chain link fence fabric.
Tighten the brace brands.
Fill the excess space in the line post holes with dirt and tamp the ground using the steel tamping bar. Measure that each post is still plumb as you finish filling the hole.
- Install the Chain Link Fence Fabric and Tension Bars
Roll out the chain link wire mesh along the ground on the outside of the fence. You may need to clip the fence fabric, using wire cutters, if it is too long for your fence line. Chain link fence fabric commonly comes in 50ft long rolls. Weave the tension bars through the ends of the mesh.
Lift the chain link fabric off the ground and slide the tension bar into the openings of the tension bands that you slid on to the terminal posts earlier. You may need to re-weave the tension bar back through the chain link mesh as you do this step. Secure the tension bars in place by placing a carriage bolt through the tension bands and tightening the carriage bolt & nut. The finished height of the mesh should overlap the top rail by one to two inches.
- Stretch and Tighten the Chain Link Mesh
Hook your stretcher bar to the tension bar that you have weaved through the chain link fence fabric. Crank the come-along to begin pulling and tightening the chain link fence fabric. You want to tighten the chain link mesh until the fabric stretches to almost perfectly square diamond shapes. You will know the fence has been pulled and tightened enough when the mesh diamonds give less than a quarter inch when squeezed. You can remove the excess mesh using your wire cutters. Cut one vertical strand of wire and pull it free. Place the tension bar into the tension bands and finish tightening the carriage bolts on the tension bands once you are done. Release the fence come-along after tightening the tension bands.
- Thread the Tension Wire
To ensure that the fence is sturdy from top to bottom, we recommend installing a tension wire along the bottom of the chain link fence. Thread the tension wire through the bottom loops or the bottom row of diamonds in the chain link mesh. Tighten the wire around the terminal posts and wrap the wire numerous times to secure it. Add hog rings throughout the bottom of the fence for added security.
Let the Pro’s at Big Jerry’s Fencing Install your Chain Link Fence
At Big Jerry’s Fencing, we make buying fences fast and easy so you can protect your loved ones and your investments. If you would rather let an experienced fence professional install the chain link fence for you, call 833-253-8580 or click the free estimates button today and one of our local fence experts will reach out to you to consult about your chain link fence project.
Big Jerry’s Fencing handles all types of fence projects and is a top-rated fence company located near you in Atlanta, Charlotte, Clayton, Creedmoor, Durham, Fayetteville, and Brunswick CO, Greensboro, Harnett County, Holly Springs, Nash County, Raleigh, Jacksonville, Orlando, Tampa, Nashville, Boise, Baton Rouge, East Atlanta, Pittsburgh, Columbus, and Northwest Arkansas.
Let Big Jerry’s Fencing add protection, privacy, and value to your home or business. Big Jerry’s Fencing offers free fence estimates and fence financing, so you don’t have to delay fence project any longer.