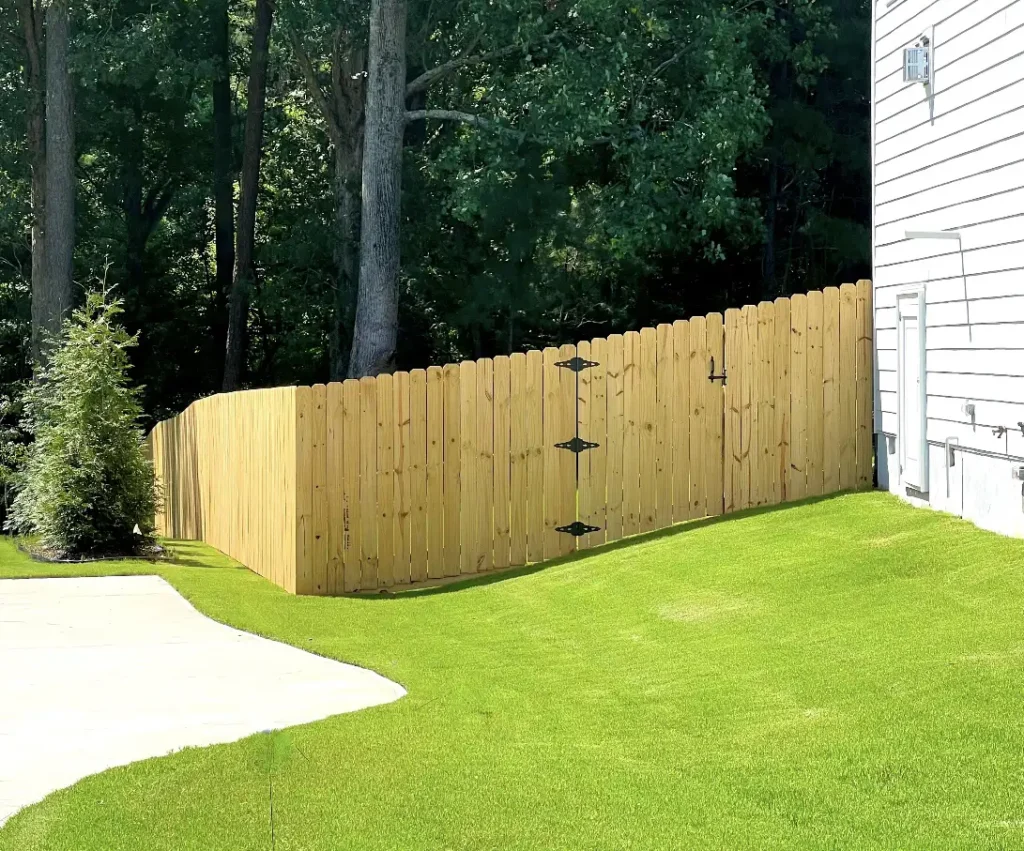
When done right, a wood fence can be one of the most beautiful additions to your home. It is timeless, customizable, and can be stained or painted to match any home design. It is important to consider that by nature, all wood is subject to warping, waning, twisting, cracking, or splitting. Extreme temperature changes can increase the likelihood of this happening to your wood fence. If you are concerned about warping wood, it may be a good idea to consider installing a vinyl fence instead of building a wood fence. This DIY guide shows 10 steps for how to build a wood privacy fence at your home. Before getting started, take a look at our fence-style gallery for some fence design ideas.
Tools:
- Post Hole Digger or Auger
- Circular Saw or Skill Saw
- Nail Gun
- Measuring Wheel
- Tape Measure
- Mason Line
- Steel Tamping Bar
- Level
- Pencil
Materials:
- Wood Fence Pickets
- 2x4x8 Ground Contact Lumber
- 4×4 Fence Post Ground Contact Lumber
- 6×6 Fence Post Ground Contact Lumber
- 2” Galvanized Ring Shank Nails
- 3 ½” Galvanized Ring Shank Naiks
- Concrete
Plan for your Fence
Step 1: Locate your property lines. Before planning your wood fence layout make sure you have your property pins located so that you install the fence within your property boundaries. https://bigjerrysfencing.com/preparing-for-your-fence/
Always call 811 to have your utility lines marked. This will tell you where you cannot dig and may impact the fence’s layout. Learn more about having your utility lines located and marked before digging holes in the ground: https://bigjerrysfencing.com/what-is-811-locating-utility-lines-for-your-fence-installation/
Step 2: Measure each fence line where you plan to install the wood fence. You can use a measuring wheel for convenience or a long tape measure for precision. Use chalk or spray paint to mark the ground where you plan to stop, start the wood fence, and mark the corners along the way. If you plan to install a wood gate, mark the gate opening. Wood gates tend to be heavy, we recommend keeping your gate width 4ft to 5ft wide for swinging single gates, unless you will use a metal gate frame.
Step 3: Make a list of wood fence materials you will need to complete the job. A standard wood privacy fence is usually built in 8ft wide sections. Measure each fence line, divide that number by eight, and round it up. This number tells you how many 4×4 wood fence posts you’ll need for each fence line. Add one for each corner in your fence layout. Take the total number of 4×4 fence posts and multiply by three to determine how many 2x4x8 horizontal fence rails you will need. Add one 6×6 wood fence post for each gate. Account for two 6×6 wood fence posts if you are building a wooden double gate. The number of wood fence pickets you will need is determined by the style of wood fence you are installing. The traditional wood privacy fence, where pickets sit side by side, calls for 17 pickets (6” wide pickets). If you are building a board-on-board or shadowbox-style wood fence, you’ll need 22 pickets per section when using a 3.5” spacing. We always like to order a few extra fence pickets to account for waste, but there are always a few bad pickets in the bunch. If you are installing a traditional wood privacy fence, divide your footage by eight and then multiply by 18 to determine how many fence pickets you need for the job. If you are building a shadowbox-style wood fence or a board-on-board wood privacy fence, divide your footage by eight and multiply by 23 to get your picket count. Purchase one 60lb bag of concrete per 4×4 post and two bags of 60lb concrete per 6×6 post.
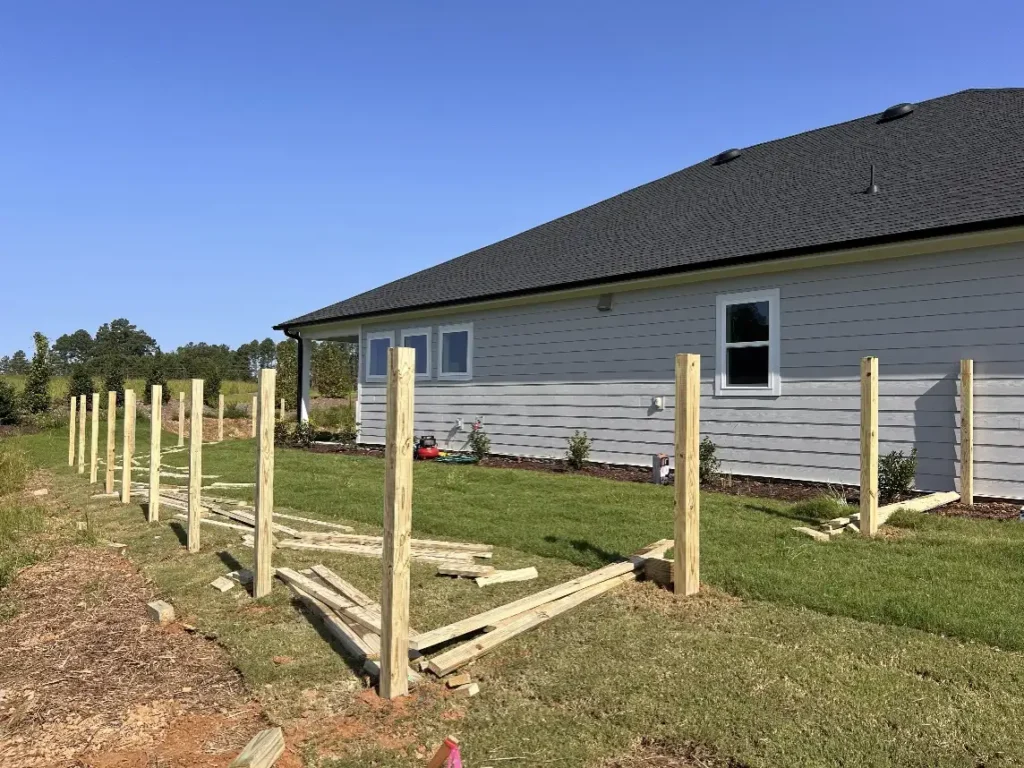
Step 4: String a mason line for each fence line. Install a wood fence post at each end, corner, and steep grade shift. For a 6-foot-tall wood privacy fence, we like to set the posts in the ground so the top of the wood fence post sits approximately 5 feet 7 inches to 5 feet 9 inches above ground level, and we tie the string line at the top of the fence post, where the top of the highest 2×4 fence rail will sit. Tie a string from each fence post and stretch it tight. Run the string line through all your gate openings so the gate aligns with the rest of the fence. It is a good best practice ALWAYS to use string lines when installing a new fence to guarantee your fence lines are straight and NEVER eyeball where you are setting your fence posts.
Dig Your Fence Post Holes
Step 5: Dig your post holes in the ground using a powered auger or by hand using a post hole digger. Wood fence posts will be set apart equal to the distance of the fence panel you are building. When building a standard wood privacy fence with 8ft wide fence sections, you will dig fence post holes 8ft apart on-center. To determine how deep you should dig a wood fence post hole, the industry standard is to set your fence posts in the ground 1/3rd of the height of the fence. If you are installing a 6ft tall wood fence you will need to set the fence posts in the ground at least 2ft deep. Refer to local building codes for guidelines on how deep to set fence posts in your area as frost depth will play a factor in this.
Set the Wood Fence Posts
Step 6: Set the wood fence posts in the holes. The wood fence posts should be touching the string line without pushing it outward. When setting your fence posts in the ground, check that the fence posts are level and plumb to ensure a wood fence installation that will be straight and true. Pour the concrete mix into the fence post hole and follow the mix instructions. In some areas, the ground moisture will work with the concrete mix and cure or harden the concrete in 48-72 hours. Use 60 lbs of concrete, or one bag, per post hole and fill the remaining space in the hole with the excess dirt from when you dug the post. Tightly pack the dirt surrounding the post using the plant end of your steel tamping bar. We always recommend using concrete when installing a wood fence: https://bigjerrysfencing.com/should-i-concrete-fence-posts-or-not/
Understanding what the different-sized wood fence posts are for:
- 4×4 wood fence posts go everywhere else.
- 6×6 wood fence posts go on the side of the gate where the hinges will be installed.
Attach the Wood Fence Top Rail
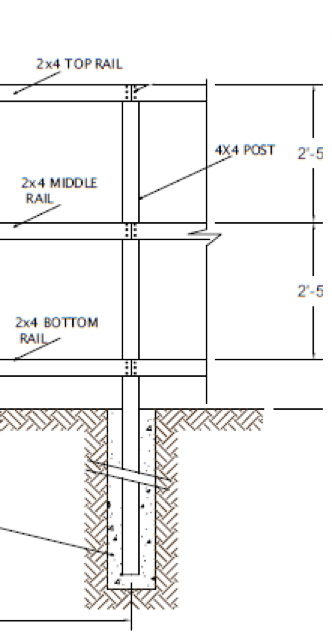
Step 7: Attach the 2×4 top fence rail to the top of the fence posts. Use the string line as your guide to keep the top fence rail level.
Attach the Middle and Bottom Wood Fence Rails
Step 8: Measure down from that 2×4 top fence rail to attach the remaining fence rails. We recommend measuring 2’-5” down from the top of the top fence rail and setting the top of your middle fence rail. Measure another 2’-5” from the top of the middle fence rail to set the top of your bottom fence rail. This will give you the railroad straight fence rails you want when building your wood fence. Use three 3.5” galvanized ring shank nails to attach each fence rail to their respective fence posts. Each 2×4 fence rail should have a total of six 3.5” nails, three at each end where it meets a post.
Nail the Wood Fence Pickets
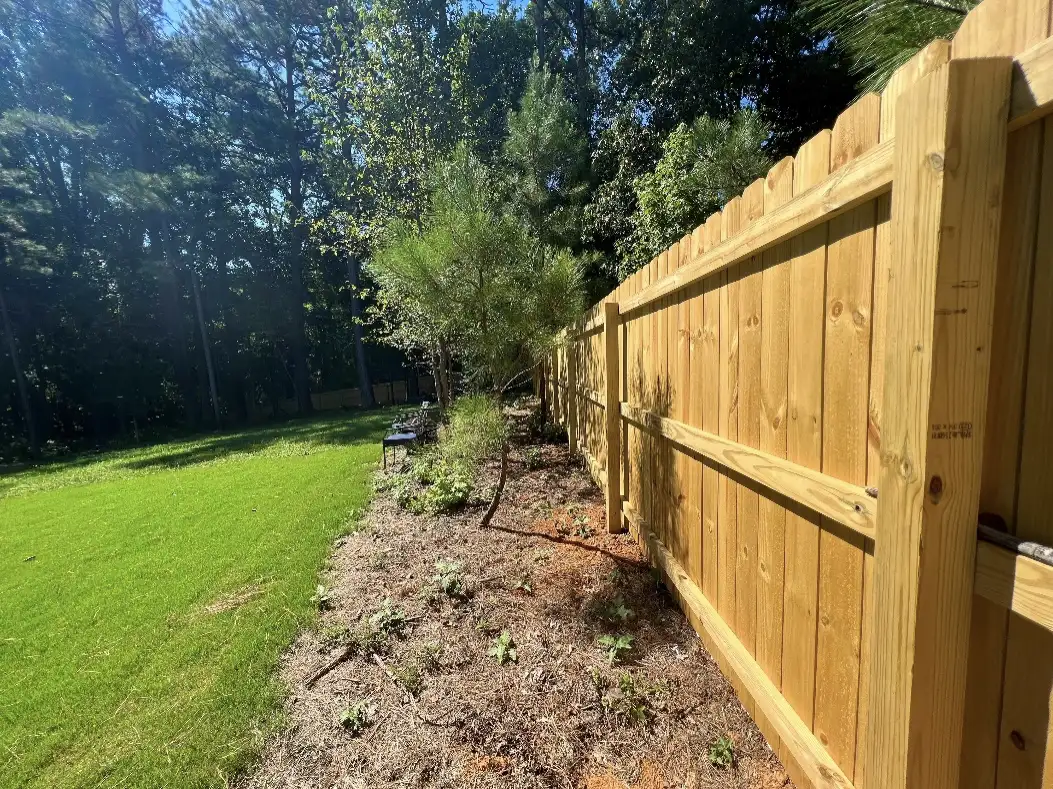
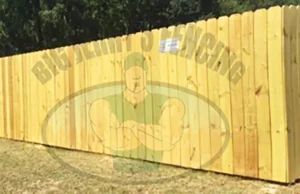
Step 9: Nail the wood fence pickets to the fence rails. Using 2” galvanized ring shank nails. Put your first nail into the fence picket where it meets the top fence rail. We recommend leaving a 1-2” gap above ground level and placing the top of the fence picket approximately 5 inches above the top of the fence post. Check that the first picket of the fence is plumb and level, and insert the rest of your nails. We recommend two nails per picket per rail. Each 6-foot-tall fence picket would have a total of six nails, two in each fence rail. Place your next fence picket side by side with the first one and continue to nail. We recommend checking for plumb and leveling every section to catch any errors or bad pickets that may be throwing things off before it’s too late.
Step 10: Build your wood gate. For guidance on building a wooden gate, read our article on adding a gate to an existing fence.
Get Your Wood Fence Professionally Installed by Big Jerry’s Fencing
At Big Jerry’s Fencing, we make buying fences fast and easy so you can protect your loved ones and your investments. If you would rather let a local fence professional build the wood fence for you, call or click bigjerrysfencing.com today and one of our fence experts will reach out to you and provide you with a fair and hassle-free wood fence estimate.
Big Jerry’s Fencing is a top-rated wood fence company located near you in Atlanta, Charlotte, Clayton, Creedmoor, Durham, Fayetteville, and Brunswick CO, Greensboro, Harnett County, Holly Springs, Nash County, Raleigh, Jacksonville, Orlando, Tampa, Nashville, Boise, Baton Rouge, East Atlanta, Pittsburgh, Columbus, and Northwest Arkansas.
Let Big Jerry’s Fencing add protection, privacy, and value to your home. Big Jerry’s Fencing offers free fence quotes and fence financing, so get started on a new wood fence for your yard today!


One Response