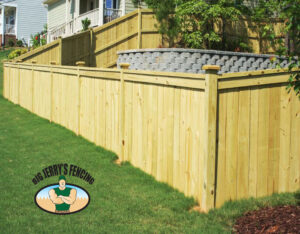
Vinyl fences or PVC fences are one of the most popular fence materials available in the fence industry due to their durability and low maintenance. Most vinyl fence manufacturers offer a warranty that protects against defects such as peeling, flaking, blistering and corroding. While the demand for vinyl fencing continues to grow, vinyl fence can be tricky to install if you choose to do it yourself. This DIY guide shows 10 steps for how to install a tongue and groove vinyl privacy fence in your yard.
Tools:
- Post Hole Digger or Auger
- Circular Saw or Skill Saw
- Impact Drill
- Measuring Wheel
- Tape Measure
- Mason Line
- Level
- Pencil
Materials:
- Vinyl Fence Panels
- Vinyl Pickets
- Vinyl Top Rail
- Vinyl Bottom Rail
- Vinyl U Channels (2)
- Vinyl Line Posts
- Vinyl End Posts
- Vinyl Corner Posts
- Vinyl Post Caps
- Concrete
Plan Your Fence Layout
Step 1: Before you begin digging, always call 811 to have your utility lines marked. This will tell you where you cannot dig and could impact the layout of the fence. Learn more about locating your utility lines before digging in the ground.
Step 2: Measure each fence line where you plan to install the vinyl fence. You can use a tape measure or measuring wheel. Use spray paint to indicate where the fence starts, stops, and each corner. If you are installing a vinyl gate, then be sure to mark the desired gate opening. Make sure you have your property pins located before installing the vinyl fence so that you do not encroach on your neighbor’s property.
Step 3: Make a list of materials that you will need to complete the job. Vinyl fence panels usually come in 6ft wide or 8ft wide sections. Take the measurement of each fence line and divide that number by the width of the panel to determine the number of fence panels that you will need. Take the number of fence panels that you need for each fence line and subtract one from it to determine how many line posts you will need. Each corner in your fence plan calls for one corner post. Anywhere the fence ends, you will need an end post. End posts are needed where the vinyl fence meets the home and at the end of any straight line where the fence does not turn a corner. If you are installing a vinyl gate you will also need an end post for each side of the vinyl gate opening. There are metal gate post inserts that are inserted in to the post on the hinge side of the gate to support the swinging weight of the vinyl gate.
Step 4: Run a mason’s line for each fence line. Install an 18-inch stake at each corner and end, as well as any steep changes in grade. Tie a string from each stake and make sure it is pulled tight. Run the string through all your gate openings to make sure the fence continues in a straight line after the gate is installed. For a vinyl fence installation, we recommend running the string line at the desired height of the bottom of your fence so that you can easily set your posts at a consistent depth. ALWAYS use string line when installing a new fence to ensure your fence lines are straight, and NEVER eyeball the placement of your fence posts.
Dig Your Fence Post Holes
Step 5: Dig your post holes in the ground using the post hole digger or auger. Vinyl fence posts will be set apart equal to the distance of the fence panel you are using. If you are using 6ft wide vinyl fence sections, you will dig fence post holes 6ft apart on-center. To determine how deep you should dig fence post hole, the industry standard is to set your fence posts in the ground 1/3rd of the height of the fence. If you are installing a fence that is 6ft tall, you set the fence posts in the ground 2ft deep. Refer to local building codes for guidelines on how deep to set fence posts in your area as frost depth will play a factor in this.
Install the Fence Posts and Fence Panels
Step 6: Set the vinyl fence posts in the holes. Pay attention to the holes on the posts and make sure the holes face the direction that you are installing the fence as these holes will hold the horizontal vinyl fence rails. The vinyl fence posts should be touching the string line without pushing it outward. When setting your fence posts in the ground, check that the fence posts are level and plumb to ensure a good vinyl fence installation. Pour the concrete mix into the fence post hole and follow the mix instructions. In some areas, the ground moisture will act with the concrete mix and cure or harden in 48-72 hours. Use 60 lbs of concrete, or one bag, per post hole and fill the remaining space in the hole with dirt. We always recommend using concrete when installing a vinyl fence.
Use the fence posts in the right location
- Line posts have holes that support fence panels on each side going in a straight line.
- End posts have one set of holes facing the direction the fence is being installed
- Corner posts have holes on perpendicular ends of the fence post allowing for a fence line to take a 90-degree turn.
Step 7: Insert the bottom vinyl fence rails. Begin by inserting the bottom rails into the holes at the bottom of the post. The opening in the bottom rail should face upward. Slide one end of the rail into the opening of one post. Then, pull the rail upward and slide it down the center of the next post until the rail inserts into the hole in the second post. Many vinyl fences come with an aluminum insert in the bottom rail, if your vinyl fence product comes with an aluminum insert, ensure that rail is used for the bottom rail so that is supports the weight of the fence.
Step 8: Assemble the vinyl fence panels. Begin by inserting the u-channels into the bottom rail and flush against the posts. Make sure the opening in the u-channel faces away from the fence post and the flat end meets the post, use the provided hardware for securing. Begin inserting the tongue and groove vinyl fence pickets. The pickets have a tongue on one edge and a groove on the other, so when they are aligned, it quickly locks the boards together. Once you reach the fence post on the other end, put the last picket in first and slide the second to last picket in afterward so everything connects smoothly.
Step 9: Insert the top vinyl fence rails. Slide the top fence rail on top of the pickets, insert the end of the rail into the top hole in one fence post, guide the rail down over the pickets, and insert the other end of the fence rail into the hole near the top of the second fence post.
Step 10: Install the vinyl fence post caps on top of the fence posts and use PVC adhesive glue to secure the post caps so they don’t blow off in the wind. Use a rubber mallet to tap the post cap onto the post without scratching or denting the post caps
Get Your Vinyl Fence Installed by Big Jerry’s Fencing
At Big Jerry’s Fencing, we make buying fences fast and easy so you can protect your loved ones and your investments. If you would rather let a local fence and gate professional do the dirty work for you, call or click bigjerrysfencing.com today and one of our local fence experts will reach out to you and assist in providing you with a fair and hassle-free vinyl fence estimate.
Big Jerry’s Fencing is a top-rated vinyl fence company located near you in Jacksonville, Atlanta, Charlotte, Clayton, Creedmoor, Durham, Fayetteville, and Brunswick CO, Greensboro, Harnett County, Holly Springs, Nash County, Raleigh, Jacksonville, Orlando, Tampa, Nashville, Boise, Baton Rouge, East Atlanta, Pittsburgh, Columbus, and Northwest Arkansas.
Let Big Jerry’s Fencing add protection, privacy, and value to your home. Big Jerry’s Fencing offers free fence quotes and fence financing, get started on your outdoor home projects today!


