Many homeowners find the need to add a gate to an existing fence. Maybe you just moved into a new home and want to add a gate so you can access your backyard from both sides of the home. Maybe you are tired of having to walk all the way around the house with your lawn mower to get to your one gate every time you cut your grass. Or how about when your children throw a ball over your back fence into the woods, and you have to go through your neighbor’s yard to retrieve it? Having conveniently placed gates makes it easier to get in and out of your yard. So, the question is, how do you add a gate in to an existing fence without having to tear the whole fence down? This DIY guide discusses converting a fence into a gate in 10 easy steps.
Tools Required:
- Reciprocating Saw or Sawzall
- Circular Saw or Skill Saw
- Post Hole Digger or Shovel
- Nail Gun or Hammer
- Drill
- Tape Measure
- Level
- Pencil
Materials Required:
- Heavy Duty Hinges
- Gate Latch
- Wood
- Fence Pickets
- 2x4x8 Outdoor Lumber
- 4×4 Fence Post
- 6×6 Fence Post
- Galvanized Ring Shank Nails
- Decking Screws
- Concrete
Measure Twice, Cut Once
Step 1: Determine your preferred width of the gate opening. If you commonly bring things in and out of your yard, be sure to take the size of those things into account. For example, if you have a lawn mower with a 48” cutting deck, a 4ft wide gate would be a pretty tight squeeze. Measure your stuff and figure out what gate size works best for you.
Step 2: Mark your cuts on the existing fence. Mark the existing fence in all four corners of the desired gate opening: top left, top right, bottom left, and bottom right.
Step 3: Measure your markings and use a level to ensure your gate opening will be square.
Step 4: Now that you’ve measured, marked, and measured again, it is time to cut. Using your reciprocating saw, follow your markings and cut into your existing fence.
Step 5: Take out the section of fence you just cut. Be careful not to damage the fencing on either side of the cut panel if possible.
Dig and Set Your Fence Posts
Some DIY guides will tell you to reuse the panel you just removed. While that is possible, at Big Jerry’s Fencing, we like to build new gates. However, the steps below apply to building new gates or reusing your existing fence material. Building a new gate will ensure that it is built to last. Your gate gets a lot of use, and reusing old material will likely lead to gate failure sooner rather than later.
Step 6: Dig holes in the ground at each end of the opening for your new posts. Always Call 811 before you dig to have your underground utility lines marked. Hitting an underground utility line can result in costly fines, repairs, and injury or death. Read this article to learn more about 811. or watch our video:
The rule of thumb is that you want 1/3rd of what is above ground to be installed below ground. So, if you have a 6ft tall fence, you would want your fence posts to be set at least 2ft in the ground. Refer to your local frost depth for guidance on how deep you need to dig and set your fence posts.
Set your fence posts in the ground. If you recall from the material list, we recommend getting a 4×4 fence post and a 6×6 fence post for a standard single. Please note that if you are building a double gate, one that has two gate doors that swing open and meet in the middle, giving the French door effect, we recommend using two 6×6 fence posts, one for each side, since you will be hinging your gate on both sides. The 6×6 is what we call the hinge post. The hinge post will be the weight-bearing post to which you will attach the hinges. The hinges are what allow the gate to swing open and close. Be sure to take into account any obstacles that might impede the gate’s path to swing open. Once you’ve determined which side your gate will hinge on you can set your 6×6 fence post in the ground, we always recommend using concrete with your gate posts for added stability. The 4×4 fence post is going to be the latch post, that is the side that the gate latches to when it is in closed position. Again, we recommend using concrete with your latch post since the gate will be swinging closed against that fence post. It needs to be sturdy as well. Refer to our article on using concrete for more information on the benefits of using concrete with your fence posts.
Once your fence posts are set in the ground with their concrete footers attach the existing fencing on each side to the center of the new fence posts, you can use nails or screws for this.
Build Your Gate Frame
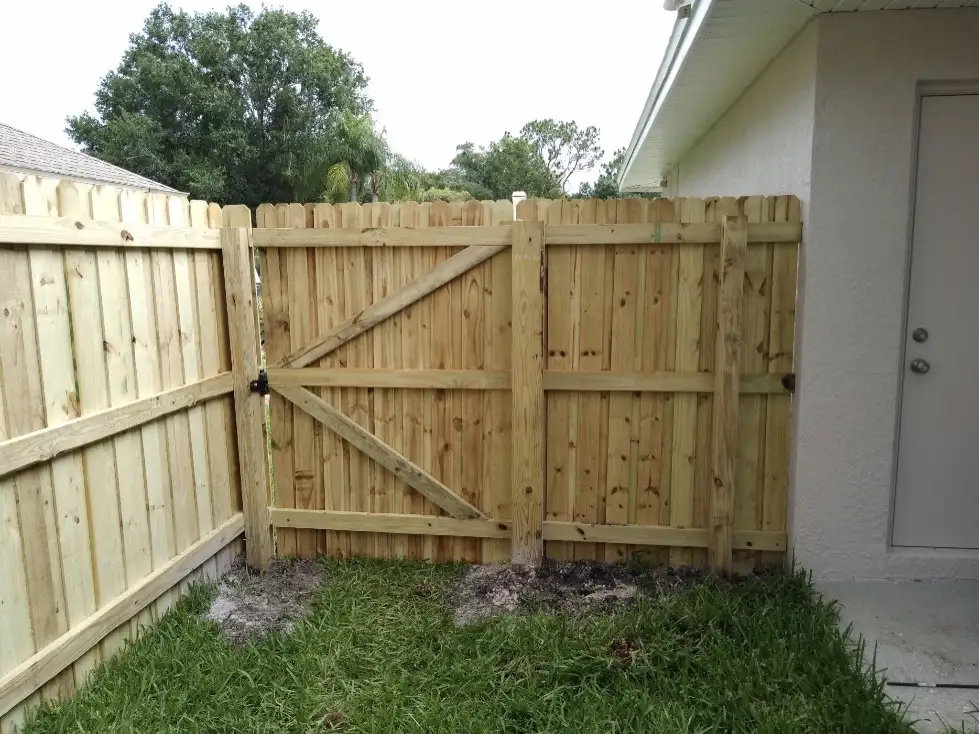
Step 7: Now, you can begin building your gate. Measure the width from the center of each fence post. Cut and attach 2x4s to span from the center of each post and use a level to ensure that the horizontal lines are straight and continuous from the fencing on each side of the gate opening. This will give your fence the straight railroad track lines homeowners look for. Usually, a 6-foot-tall fence will have three horizontal 2×4 rails.
At Big Jerry’s Fencing, we recommend building diagonal gate bracing to form a pointed arrow that points toward the gate latch, as pictured below. You will need to measure from the top and bottom corner near the 6×6 hinge side fence post to the middle horizontal rail where it will latch to the 4×4 latch side fence post. Cut these diagonal 2x4s at a 45-degree angle. Attach the diagonal 2×4 bracing to the horizontal 2×4 rails using coated decking screws.
Read our post about options for gates to learn more about ways to bolster your gate and make your gate sturdier.
Attach Fence Pickets to Your Gate Frame
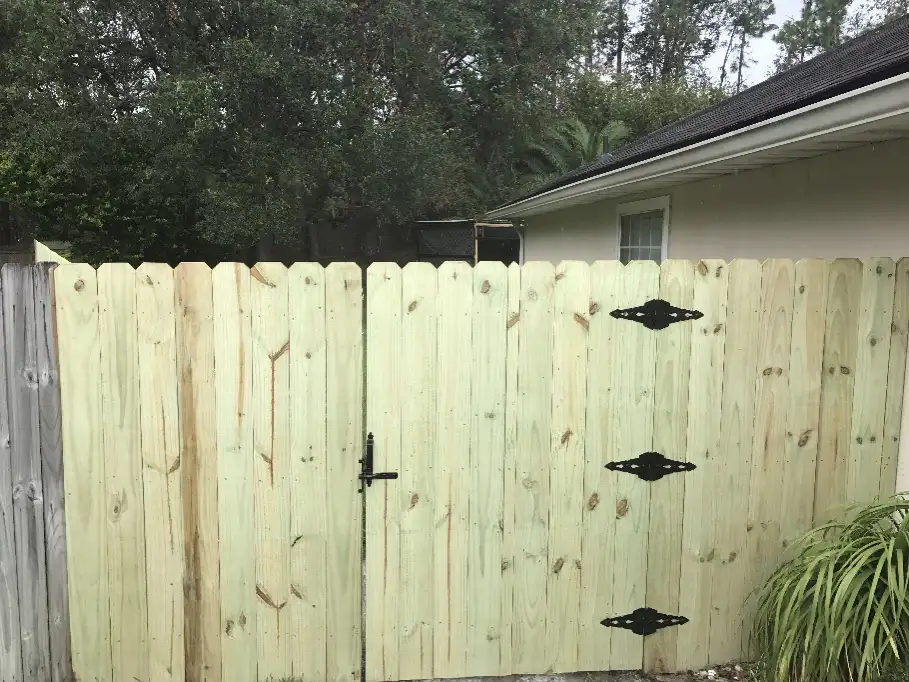
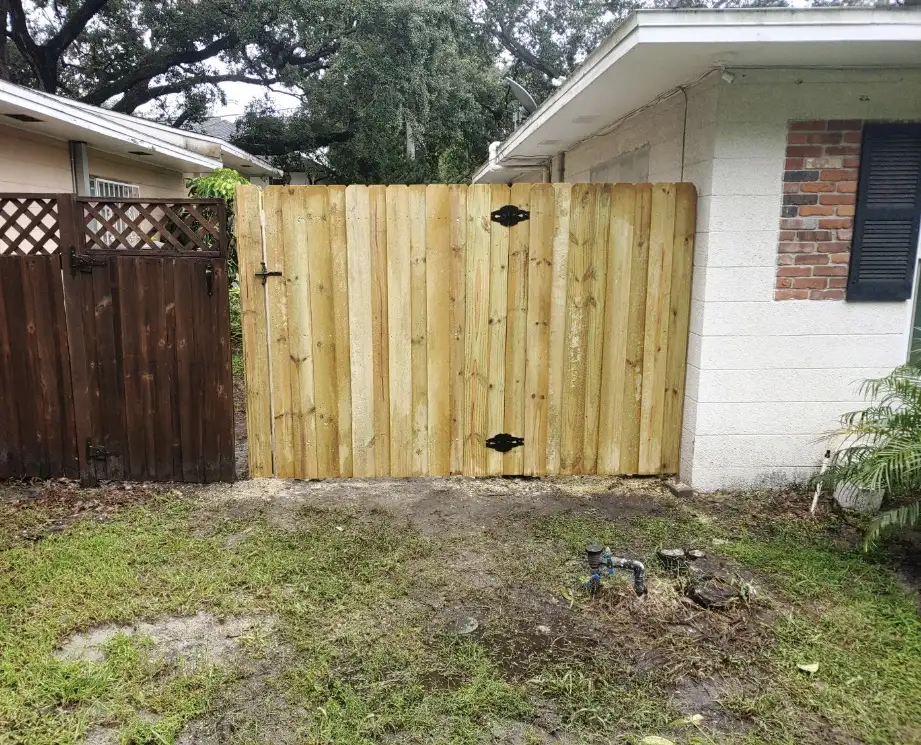
Step 8: Attach the fence pickets of your choice to the outside of the gate frame. We recommend using ring-shank galvanized nails when attaching wood fence pickets to wood 2x4s. Use a level to ensure the pickets are level and plumb before securing. You can attach the pickets side by side for a traditional privacy fence look.
If you are looking for true privacy, try a board-on-board design by spacing your pickets apart 3½” and attaching an overlapping layer of pickets that overlap the first row of pickets by 1 inch on each side.
Cut Your Gate Loose
Step 9: Place some of your scrap-cut lumber underneath the gate to help hold it in place as you cut the gate free and attach the hardware. Cut the horizontal 2x4s from the posts. Allow for ¼” on the hinge side and 1” on the latch side
Attach the Hardware
Step 10: Your gate hinges and gate latch will usually come with their own screws. It is always a good idea to drill pilot holes before screwing in the hinges and latch. Attach the hinges first, and then install the latch. It is common to attach the latch even with the middle horizontal rail. If you have an inground pool in your backyard, refer to your local pool code for latch height regulations.
Let the Fence Pros at Big Jerry’s Fencing Build the Gate.
At Big Jerry’s Fencing, we make buying fences fast and easy so you can protect your loved ones and your investments. If you would rather let a fence and gate professional build your gate for you, call or click bigjerrysfencing.com today and one of our local fence experts will reach out to you and assist in providing you with a fair and hassle-free gate estimate.
Big Jerry’s Fencing is a top-rated fence company located near you in Atlanta, Charlotte, Clayton, Creedmoor, Durham, Fayetteville, and Brunswick CO, Greensboro, Harnett County, Holly Springs, Nash County, Raleigh, Jacksonville, Orlando, Tampa, Nashville, Boise, Baton Rouge, East Atlanta, Pittsburgh, Columbus, and Northwest Arkansas.. We also offer fence financing to help with purchasing your new gate. Don’t hold off on your home improvement projects any longer and let Big Jerry’s Fencing add protection, privacy, and value to your home.


One Response